You slave away writing detailed posts for your Blogger site, yet engagement feels nonexistent. Your visitors treat your hard work like a quick pitstop, scrolling past without a single interaction. This grinding cycle of shouting into the void is draining your passion, making you feel invisible, and leaving you wondering if your blog is just a waste of time without a chatbot for blogger.
Scared of Coding? Why Adding AI Chatbot to Blogger Feels Impossible (But Isn’t)
You’ve heard the buzz: AI chatbots can transform your Blogger blog, turning passive readers into engaged commenters and keeping people on your pages longer. But the moment you start researching how to add one, your excitement crashes into a wall of technical jargon. “Insert this script,” “configure the API,” “deploy via Node.js”—the instructions are clearly written for developers, not for someone who just wants to write and share.
You don’t know a CSS class from a JavaScript function. Every unfamiliar term feels like a locked door. So you back away, telling yourself AI isn’t for beginners. That you’d have to learn to code just to get a little chatbox running. That it’s safer to stick with a static, one-way blog. The truth? That belief is exactly what’s keeping your site stuck in a silent, engagement-free zone. You want the power of AI, but the perceived complexity has convinced you it’s impossible—and that frustration is slowly killing your blogging momentum
What Your Visitors Really Think When They Can’t Get Instant Answers Without a Chatbot on your Blogger Site (Hint: They Leave and Never Return).
Pause for a second and truly picture your average visitor. They just clicked onto your carefully crafted Blogger post, desperate for a specific answer. Your title promised exactly what they needed. But instead of a quick solution, they are met with a wall of static text. They scan. They scroll. The seconds tick by. Their need for instant gratification wars with your long paragraphs. “Where is it?” they mutter. They can’t find it in ten seconds. So their finger twitches. They hit the back button. They leave.
Here is the brutal reality they won’t tell you: They don’t care that you feared coding. They don’t care that adding AI felt “impossible.” They only know you made your convenience a priority over their time. In their mind, your blog is now tagged as “slow” and “unhelpful.” They don’t just leave that page. They leave your entire site forever. The next time they have a similar question, they won’t give you a second chance. They’ll go to a competitor, a Reddit thread, or a YouTube video that respects their urgency. You didn’t just lose a reader; you lost a potential loyal subscriber. You chose the safety of silence over the power of instant conversation. The hint in the headline is the cold, hard truth you’ve been avoiding: they leave, and they never, ever return. It wouldn’t hurt to have an AI chatbot on your blogger blogs.
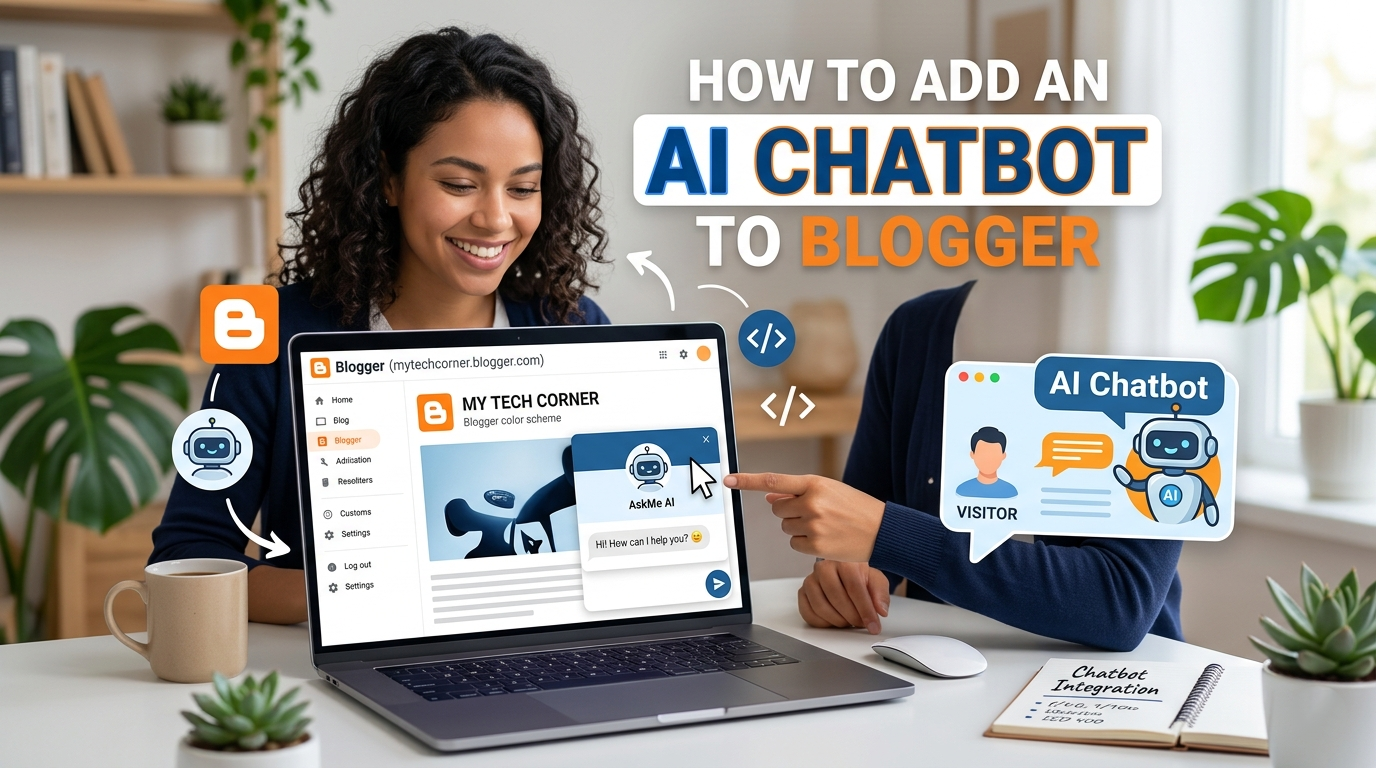
How to Add an AI Chatbot to Blogger in Under 5 Minutes (Even if You’re a Total Beginner)
The fear ends right here. Forget the jargon and the coding nightmares. You are exactly five minutes and three simple copy-paste actions away from giving your visitors the instant answers they crave. Here is the exact blueprint an absolute beginner can follow to add a fully functional AI chatbot to your Blogger site right now.
Step 1: Train Your Bot’s Brain (2 Minutes)
- Go to a no-code platform like Chatbase, Tidio, or Collect.chat.
- Sign up for the free plan. Click “Create from Website” or “Train AI.”
- Paste your Blogger’s homepage URL.
- The tool will automatically crawl and index your content.
- Name your bot. Click “Train” or “Generate.” That is it.
- You now have an AI that knows everything you have ever written. No coding required.
Step 2: Copy the One-Liner (30 Seconds)
- The platform will present you with an installation screen.
- Look for the “Embed Code” or “Install Script” section.
- You will see a single
<script>tag. - Highlight that entire block. Press Ctrl+C (or Cmd+C for Mac). This tiny piece of text is the engine that runs the chat widget.
Step 3: Lock It Into Blogger (2 Minutes)
- Open your Blogger Dashboard. On the left-hand menu, click Layout.
- Scroll down to the Bottom of Page section.
- Click the blue Add a Gadget link. A pop-up window will appear.
- From the list, scroll until you find HTML/JavaScript and select it. In the “Content” box, press Ctrl+V to paste the script.
- Leave the title blank. Click Save. Then click the orange Save Arrangement button at the top right.
Step 4: Watch It Come Alive (Instant)
- Open your blog in a new tab. Look at the bottom right corner.
- A sleek, professional chat widget is waiting there. Click it.
- Type a question related to your latest post.
- Watch the AI answer intelligently, instantly, pulling directly from your content.
Done. You started this section terrified of broken code and complex APIs. You ended it with a fully functional AI assistant living on your blog. No degrees. No developers. Just a smart chatbot working for you while you sleep. Your visitors will never feel ignored again. You just broke the barrier between static text and dynamic conversation forever.
Would you like to learn how to add an AI Chatbot to Your WordPress Blog – A No-Code Way?
Leave a Reply